


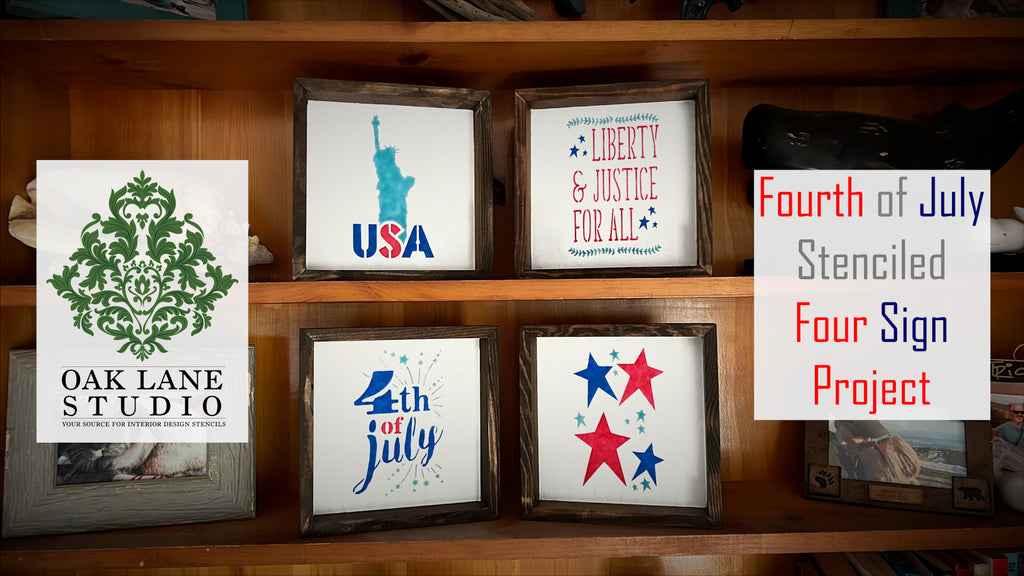

DIY Fourth of July Decor | Fourth of July Stenciled Four Sign Project | Oak Lane Studio
Put your patriotism on display with this Fourth of July Four Stenciled Sign Project from Oak Lane Studio!
This fun project is the perfect way to add some style to your home this Easter. Old signs can refurbished with just a little bit of work or, if starting from scratch, unpainted signs can be purchased online.
What are the types of stencils?
At Oak Lane Studio, we make stencils for a variety of purposes, from interior design to home décor to personalizing unique gifts!
What to use for stenciling?
We have everything you need to for your stenciling project, including an incredible selection of stencils for all occasions and tastes, brushes, rollers, paints, adhesives, etc.
What paint to use for stenciling?
The type of paint you need depends on the application. We offer acrylic paints for indoor projects and patio paints for outdoor use. For fabrics, just mix a little Fabric Medium (available on our website) with the acrylic paint. Acrylic paint can also be for glass and whiteboards by mixing it with household dish soap.
Do you pull stencil off wet or dry?
It’s best to remove your stencil while the paint is wet. This will prevent dry, peeling paint from ruining the crisp, clean lines created by utilizing proper stenciling techniques.
How do you keep paint from bleeding under stencils?
It’s easy to prevent paint from bleeding underneath your stencil. Simply ensure that your brush or roller is barely wet with paint. This is achieved, after soaking the foam or bristles, by repeatedly swirling or rolling it onto a stack of paper towels prior to applying the paint through the stencil. Layer the color using numerous light coats.
Here's what you'll need:

- Antique Stars Stencil (re-sized by our Custom Dept.)
- 4th of July Stencil (re-sized by our Custom Dept.)
- Lady Liberty Stencil (re-sized by our Custom Dept.)
- Liberty and Justice for All (re-sized by our Custom Dept.)
- Americana Acrylic Paint
- Primary Red
- Primary Blue
- Desert Turquoise
- Titanium White
- Repositionable Spray Adhesive
- Stencil Brush
- Double-Ended Stencil Brush
- Frog Tape
- Gyro-Cut Craft and Hobby Cutting Tool
- Wood Stain
- Utility or Hobby Knife
- Small Flat Paint Brush
- Unfinished Square Wooden Frames (x4)


First, use Frog Tape painter's tape to mask off your wooden frame from the background.
Trim excess tape using a utility or hobby knife. Next, use a putty knife to help press the tape tightly into the corners. Cover the entire background to protect it from the wood stain.


Carefully follow all the instructions listed on the can, especially those regarding safety.
Apply the stain liberally while wearing protective gloves in a well-ventilated area. Take care that the brush is not too wet when applying stain close to the masked areas. This will help prevent the stain from seeping underneath the tape.
After applying the stain, use a clean rag to wipe away the excess oil.
Repeat the masking and staining procedure for all four frames.


Once the stain is dry to the touch, mask off the background using the Frog Tape.
Give the background a couple of coats of Americana Titanium White acrylic paint.


Now, take your Antique Stars stencil and position it inside the first frame.
Use Frog Tape on either side to hold the stencil in place.
Next, use small pieces of the tape to mask off portions of the design that are close to the stars that you’ll be painting first.


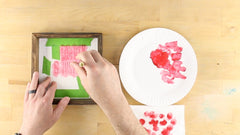
Thoroughly shake your bottle of Primary Red Americana Acrylic Paint prior to pouring out a small amount onto a paper plate.
After soaking the bristles, remove excess paint first by wiping the brush on the edge of the plate, then by swirling the bristles on a stack of paper towels.
Apply the paint in numerous light coats using the same swirling motion.
Once finished, place this frame aside to dry.


Repeat the process for the “S” of the Statue of Liberty stencil.


Next, stencil the text of the “LIBERTY & JUSTICE FOR ALL” using the red paint.


Do the same for the “of” text of the Fourth of July stencil.


Back to the star sign - remove the masking pieces of tape and reapply to isolate the next couple of stars to be painted.
The next color to be stenciled is Primary Blue.
Paint the next couple of stars using the same technique as you did earlier with the red.


Next, stencil the “U” and the “A” of the Statue of Liberty sign.


Fill in the small stars of the Liberty & Justice for All design.


Now, complete the “4th” and “july” text of the next sign.


Next, remove the masking pieces of tape from the stars sign.
Now, it’s time to for the third and final color: Desert Turquoise.
Stencil the remaining elements of the Stars stencil, taking care not overlap the other already-painted stars.
Carefully remove the tape and peel the stencil straight up to reveal your first completed sign.


Next, finish up Lady Liberty herself on the “USA” sign.


Stencil the laurels to finish off the Liberty design of the third sign.


Lastly, paint the fireworks elements of the 4th of July stencil.
Your signs are now complete and ready to celebrate our independence!

For more tips and ideas, visit OakLaneStudio.com today.